Greetings and today let's talk about the PlayStation Classic!
Or rather, my reaction to it.
Cuz I was seriously lookin' forward to this thing but after seeing the final result?
I'm giving it a hard pass.
And I slapped together an LGRStation instead!
It plays all the PS1 games I want and costs less than a hundred bucks.
And we're gonna make one today using a Raspberry Pi and the help of a few handy websites!
All right let's dive into the LGRStation Classic!
Heh, or whatever you wanna call it.
I know this isn't revolutionary or anything and I'm certainly no Ben Heck when it comes
to building stuff, but I still think this thing is pretty darn useful.
If you're only here for the build section you can skip to this point in the video, but
otherwise: first a little backstory.
Because man, the PS1 is easily one of my favorite systems of all time, so a miniaturized version
emulating twenty games had my attention.
But what Sony came up with in the PlayStation Classic confounds me.
No Crash Bandicoot, Tomb Raider, or even Gran Turismo, no analog controller option for the
games that support it, and a rather lackluster selection of emulator tweaks
compared to the competition.
Then I saw the lukewarm preview coverage of the PlayStation Classic in November 2018 and
my disappointment was palpable.
Just, the more I hear about this thing the worse it looks.
Especially since I already had an alternative I'd put together one weekend back in June of 2017.
So I posted this tweet to gauge interest in a video.
And well, your reaction was pretty clear so here were are with the LGRStation Classic!
It's a Raspberry Pi 3 Model B in a 3D printed case running the RetroPie frontend.
That's it, nothing fancy or exotic.
And I'm well aware this kind of solution is not news to many of you.
But for those of you that have never done so before, or are simply curious what parts
I chose, the rest of this video is for you.
The first item is of course a Raspberry Pi, which is really just a tiny system on a chip
with some handy integrated interfaces, and for this I went with a Raspberry Pi 3 Model B.
There are plenty of Pi models out there and some new ones have come along since I first
put this together, but the 3 Model B is more than capable of running PS1 games and only
costs 35 bucks.
However, it tends to have some challenges with heat distribution, especially if you
put it inside of a case.
So I added these two straight-fin aluminum heatsinks from LoveRPi, which was sold as
a set for $1.99 back when I bought them.
They come with some nice thermal transfer adhesive and just stick on there, dropping
temperatures by a good 25% according to my own testing.
Seriously, do not skip the heatsinks if you're planning on running PS1 games as I ran into
a bunch of performance throttling without these installed.
The other thing I added was an official 2.5 amp power supply, again due to performance
throttling issues when emulating PlayStation games.
The Pi 3 is capable of using any micro USB power supply, but I kept running into errors
when using third party ones, constantly getting "under voltage" warnings with USB phone
chargers and generic 2.5 amp USB power supplies.
Next up is the micro SD card, which I had lying around from a previous project.
But a 64 gig card like this can currently be had for about fifteen bucks.
I've only ever used these Ultra Plus UHS-1 cards with my Pi 3, but it seems more than
quick enough to efficiently load and run PS1 games.
And 64 gigs is enough space to fit a good hundred to a hundred-fifty games or so, depending
on your selected games of course.
Then there's the case, which is a notable step down in quality from the official Classic, I'll admit.
This is a design by Filipe Campos that I had printed and shipped to me since I don't
own a 3D printer, and altogether that came to about $20.
And while it looks rough on close inspection, with whoever printed it applying this shoddy
paint job, I think it looks halfway okay at a distance sitting under my TV.
And the design appealed to me more than most other
3D printed PS1 cases I was seeing online at the time.
It doesn't have any moving parts, LED lights, or functional anything really.
It's simply a shell so the Pi itself can cosplay as a tiny PlayStation.
And it really is tiny: tinier than the official PS1 Classic
and even smaller than the Nintendo classic systems.
With that screwed together it's now ready to plug into a display, which is done using
either composite or HDMI.
For me, HDMI was the priority since I wanted to use this on a 4K TV, but this optional
cable is fun to have as an option to easily plug it into a CRT for that warm and fuzzy
composite video aesthetic.
And while prices are sure to fluctuate, here's what everything ended up costing me.
And this does assume that you already have a controller to use, a topic we'll address
in a moment.
There are links to all this stuff in the video description for your convenience, and to be
clear I am not affiliated with any of these sites or services, they just worked out for me.
Finally, there's the software side of things, which is thankfully all free.
Raspberry Pis don't come with their own OS but getting one on there is straightforward
thanks to the excellent RetroPie project, which combines things like Raspbian, EmulationStation,
and RetroArch into one pre-configured package.
In fact, one of the PlayStation emulators it comes with is PCSX ReARMed, which just
so happens to be the same emulator that Sony chose to run the official PlayStation Classic!
Anyway, download the appropriate pre-made image to your computer of choice, plug in
your micro SD card, and run either Win32DiskImager, Apple Pi Baker, or Etcher depending on your OS.
This will write the entire RetroPie setup onto the card pretty much ready to go.
Once that's done insert the card into the Pi, power it on, and behold: expanding file
systems and configuration options!
The first order or business is setting up an input device, and while it defaults to
an Xbox controller, you can customize the Pi 3 to work with nearly anything so long
as it uses USB or Bluetooth.
I went with a PS4 controller since it feels great for PS1 games and can pair with the
Pi using Bluetooth no problem.
You may have to plug in a wired device at first though since the Bluetooth pairing options
are somewhat out of the way, but once you've got it paired it should stay that way unless
you decide to pair the controller to a PS4 again.
After this, head into the RetroPie setup menu and enable wifi.
Well, unless you're connecting via ethernet of course, but wifi is nice and lazy and I approve.
Once you're connected it's a good idea to run the package updater to make sure you've
got the latest versions of everything, or maybe add more emulators if you want anything
beyond the default configuration.
But by default, the PlayStation emulators are already installed.
With that out of the way it's time to play some games!
You'll need two things: a BIOS file and some disc images.
The BIOS is the PlayStation firmware, and while there's a version of PCSX with its
own emulated BIOS, the most compatible version requires an original.
And unless you back it up yourself you'll have to find one from sites like the Internet Archive.
Same goes for disc images, or ISOs as they're commonly known, even though PCSX can handle
ten different extensions beyond just ISO files.
Once you've got some though, getting them onto the system is super simple.
You can either copy them directly onto the micro SD card or you can use your home network
to transfer them over wifi.
I prefer the latter myself due to laziness, and also because on Windows it's as simple
as typing "\\RETROPIE" into the address bar of Windows Explorer.
Bam, everything you need is accessible, no swapping of memory cards whatsoever.
Now it's time to enjoy your games!
[PS1 startup theme plays]
[Need For Speed III gameplay commences]
-"3...2...1...GO!"
[engines revving, tires screeching]
[engines revving, tires screeching] [drum and bassing]
Ahh, this is what we've been after all this time, isn't it awesome?
Well, awesome assuming that you're happy with the default emulation options.
There are a pile of options to explore in PCSX alone, with plenty of sound and visual
tweaks that are worth exploring.
I typically try to get things looking as clean and crisp as possible, while not changing
the look of the games too much.
So that means keeping the original 4:3 aspect ratio, upscaling in integers to maintain pixel
shape, and disabling things like scanline filters, bilinear smoothing, and resolution doubling.
Some might prefer that stuff, I just don't!
About the only visual tweak I've applied is the one to remove dithering, and that's
only for certain games where I prefer cleaner textures.
But for the most part I'm just happy having another way to get my PS1 gaming fix when
I feel like it, and being able to swap between my entire collection of games without leaving
my couch is wonderful.
And I don't feel as if I'm missing out on much compared to the official PlayStation
Classic either, considering this is using the same base emulation software underneath.
Sure my 3D printed case is a whole lot uglier, that's for sure, and it's not nearly as
easy to use as the real thing.
But I can play whatever I want from my collection and also use analog controllers with the games
that support it, or even those that don't by enabling a tweak in the options menu.
And of course, being that this is running RetroPie you can emulate dozens of systems
in addition to the PlayStation, as well as customize it to your heart's content with
things like custom user interfaces and graphics shaders to make things look however you like.
So yeah, that's my LGRStation Classic build.
Simple stuff, but highly versatile, to the point where I've kept it plugged into my
TV for about a year and a half now and I don't see that changing anytime soon.
The hardware is more than up to the task, the software is only getting better, so I'm happy with it.
And do lemme know in the comments if you've put together something like this yourself
using a Raspberry Pi already or if you now plan to after seeing this video.
And of course, if you like this kinda thing then do check out the rest of LGR, I make
new stuff every week on all sorts of tech.
And as always, thank you very much for watching!

 For more infomation >> Heyn and Segal win third Straight Down Fall Classic title - Duration: 1:27.


 For more infomation >> DG2 by Diane Gilman Classic Stretch Skinny Jean Basic - Duration: 13:31.
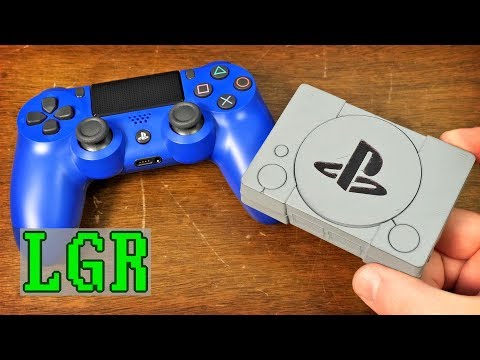

Không có nhận xét nào:
Đăng nhận xét