hi I'm Cressel Anderson this is Makercise. In this episode I'll show you how I
build this chainsaw mill from scratch. Before I get into the details of how I
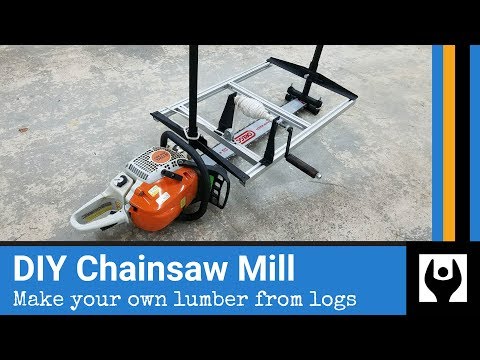
made this mill from scratch, I'll take a moment to describe what a chainsaw mill
is and why they're a great accessory for your chainsaw. A chainsaw mill is
basically a system that's designed to bolt or clamp on to your chainsaw to
constrain its movement. Chainsaw mills are a good middle ground between buying
milled lumber and investing in your own full-scale mill. The best part is: this
tool is an accessory to a tool you should already own. By helping guide your
saw the chainsaw mill can make flat cuts repeatably. Such repeatable flat cuts are
useful for cutting logs into slices down their length. These slabs are great for
tabletops or to further process into milled lumber for your woodworking
projects. Now that you have the context let's get started building this thing.
The first step is reducing raw materials down to appropriate lengths. Then I clean
them up with the grinder. With the parts pretty much ready to go, I turn my
attention to fabricating a jig for constructing the clamps. These clamps go
on either end of the chainsaw bar, and they're what allow you to adjust the
deck height relative to the bar. The jig just serves the purpose of fixturing the
clamp and the clamp upright for welding. This way I can get both the inboard
and outboard clamps pretty close to identical. I remove a little bit off of
the thickness with my planer because this jig serves double duty. It also
helps align the upright guide to the rib. I line up the clamp bolt pads and then
just tack them into place I'll go back and finish weld these later, but
initially I'm just trying to get them tacked into place. It's important that
the bar clamp pads are parallel to each other. Therefore it's important that they
don't move around when you're welding them that's why I'm using locking pliers
to secure it to the clamp.
The next really important bit is that the holes that you drill in the
clamps line up with each other. And I did this before I welded them to the clamp
uprights and that way I could be sure that when I had a fastener and the one
end the hole that I drilled through the other end was perfectly aligned between
the two halves of the clamp--upper and lower half.
Since the inboard and
outboard clamps may or may not be identical it's important to distinguish
between them I just used an awl and kind of dimpled in the letter A on one side
and the letter B on the other side that way I can keep them straight. With the
clamp bolt pads in place, I had to do a little bit of modifications to the
template. I did that with my router and that will accommodate a little bit of
extra protrusion from the clamp bolt pads.
Then I went on to start welding it up.
You probably remember my chain saw milling video from late 2015
and you may remember that I had some issues salvaging the logs from my dad's
red oak tree this mill is the answer to my old chainsaw Mills lack of capacity I
designed this mill to accommodate a variable length bar but I settled on the
monstrous Oregon power match 34 inch bar well okay maybe it's just monstrous
relative to my old 20 inch bar at any rate I'm pretty happy with that bar
selection it's handled everything I've thrown at it so far and at the time it
represented a pretty good trade-off between the incremental cost for a
longer bar and capacity.
I used an angle grinder to dial in the notch in the rib
to accept the upright guide. After I had that notch pretty well where I wanted it
I again used my jig to help me line it up for welding. Then I cleaned it all up
with an angle grinder. I cut the upright support out of a piece
of angle iron. This piece mounts in the interior of the rib assembly and
provides support for the upright guide as well as a place to mount the upright
lock bolt.
I cut a notch on the interior of the upright guide this window is where the
upright lock bolt will enter the upright guide to effectively lock the upright
into a fixed height relative to the deck. After I had the upright support welded
into place, I cleaned it up with an angle grinder and turned my attention to
fabricating the upright wedge this little piece along with its handle is
inserted into the upright guide and it provides a bearing surface for the
upright lock bolt so that that way it doesn't mar up the surface of the
upright. It can effectively transfer the clamping pressure from the bolt to the
upright. One thing that I didn't do initially that I think is a good idea is
to add a nut to the upright guide support and that way the upright locked
bolt has a little bit more meat to bite into. I'm just not sure that 1/8" angle
iron with threads cut into it is quite enough to have good durability
over the long term. I mounted both ribs on to the upright of a single clamp and
this fixtures both the ribs so that I can match drill them it's not super
critical but doing this allows me to match drill the holes and then when I
install the rails they will be parallel.
I cut the rails to length from a long
piece of extrusion. And then I squared up the ends using my table saw sled.
The 80/20 hardware that I bought is a little bit long for the rails so I had
to cut off the end and I just did that using a little piece of scrap and my
bandsaw.
Once my hardware was shortened up a
little bit I assembled the ribs to the rails for the first time to kind of get
a feel for what this thing was gonna look like. I used some L-shaped
connectors for 80/20 hardware. And that's how I connected all the rails together.
I assembled the chainsaw mill and test the fit with my chainsaw. After doing that I
moved on to fabricating the crank mechanism.
I welded on braces to both the
fore and aft crank support brackets.
The crank rod is mounted through the top of
the crank support brackets, and its job is to be a spool essentially for the
rope that I'll use to pull this chainsaw mill through the logs that I'm milling.
I matched drill a hole in both the crank support brackets to fit this crank rod
and then I just trimmed it up to make it a little lighter and look a little nicer.
I installed the crank support brackets onto the rails of the chainsaw mill
again just using that modified 80/20 hardware.
I installed the crank rod into
the crank support brackets and that way I could get a feel for how long I wanted
that crank rod to be. I marked it with a sharpie and took it over to the chop saw
and cut it to length. I threaded both ends and one end gets a thread quite a
ways back onto the crank rod. That extra length is to accommodate securing the
crank rod between the support brackets and it also serves as a mounting point
for the crank arm and handle. The crank arm assembly consists of a
piece of flat stock a piece of rod stock and a nut. I use a bolt to hold the nut
into place while I tack it on to the flat stock. The handle is made from a
piece of pine dowel, cut to length, and then drilled down it's center
So that it can slide on to the crank arm assembly.
I added some texture to the handle using
a utility knife and then I charred a handle using my propane torch. I sanded
the handle and then I gave it a couple coats of lacquer. I cleaned up the crank
arm assembly with an angle grinder, and I paid special attention to that joint
between the rod stock and the flat stock where the handle will be bearing. I took
a little bit of material off of the ribs to lighten them and improve their
appearance. I used some acetone to clean up the parts. Then I hung them from a
rack, and gave him a coat of black spray paint. I drilled out the holes on my
pulley to accommodate the 80/20 hardware. I trimmed the clamp bolts to length once
the chainsaw mill was assembled. There are a lot of off-the-shelf chainsaw mill
options, and I'll put links to some of the most popular ones down in the
description. But if you really enjoy exercising your inner maker, you'll want
to build your own chainsaw mill. If you're interested in plans for this
chainsaw mill, I'll have a link down in the description. It has the full parts
list and dimensions that I use to make this mill, in addition to specific
recommendations based on my actual experience using this mill. In a future
episode, I'll demonstrate the use of this mill in the meantime check out one of my
previous chain saw milling episodes. I'll leave links down in the description.


Không có nhận xét nào:
Đăng nhận xét