If you're struggling with drawing the female figure, and you want to learn how to draw
a fashion figure walking, stick around because in this video I'm going to show you a tutorial
on exactly that - drawing figures walking.
Hi my name is Karen, I'm a fashion designer and illustrator, and here in my channel and
in my website fashionstepbystep.com, I share all I know about fashion design and illustration,
being a fashion creative, having your own business, and everything in between
Wow, this is the fourth video on this series! I'm so happy you're here, and I'm so
excited for this and the upcoming videos
We've been learning all about drawing the female figure, how to draw faces, and how
to draw poses
And today we're gonna see how to draw a fashion figure walking
But, before getting started, make sure you watch the previous videos of this series and
you join my FREE bootcamp on 'Getting Started with Fashion Drawing' because I have some
private video and email lessons, plus some resources that you'll need for this video
series.
Join through the link on the cards or the description box.
Then come back here to complete this tutorial
If you've already joined, don't worry, you're on the right place
How to draw a fashion figure walking
Again, we're going to follow the same method I taught you in the previous videos of this
series, with some minor tweaks
Are you ready to learn how to a fashion figure walking?
Great, let's get started!
Materials
You will use the same materials
Pencil. I prefer 2H or HB. Something on the hard spectrum, so the lines are softer
Paper. Bond or tracing paper is fine. Eraser + sharpener.
Optionally ovals + circles templates, and a ruler.
Fashion Figure cheatsheet.
Remember, in the course, there are 3 different cheat-sheets for the figures, they help you
create your figures in different sizes. During this video and the following lessons, I'll
be using the 9-heads cheatsheet
So, download it, print it, and get it ready to use 😉
We've already covered what's the Fashion Figure Cheat-Sheet and how to use it, so let's
jump right into the process
In this video and all the following lessons, I'm also working on the iPad and I'm using
the app Procreate with my Apple pencil, so you can clearly see each and every single
step without my hand getting in the way.
PHASE 1 - Lines
Create a line for the center of the body
Again, instead of using the center line from the cheat-sheet
You'll draw a new line going from the base of the head until the crotch
And then, continue with that line until the top of the head. The head can be tilted, or
straight
This new center line can have the direction of your choice
Draw an oval for the head taking the whole first space
Remember you can use an oval template to create it
And make sure it's aligned to the center line you just created
Locate its center on the crosspoint of the dotted line for the shoulders and the new
center line
Make sure it measures 1 ½ heads.
Create a line for the waist
Its center should be on the crosspoint of the dotted line for the waist and the center
line
Give it the opposite direction of the shoulders
And make it measure 1 head
Draw another line for the hips
Its center must be on the crosspoint of the dotted line for the hips and the center line
Give it the same direction as the waist
And make it the same length as the shoulders, 1 ½ heads.
Draw a tiny line for the crotch
Its center must be on the crosspoint of the dotted line for the crotch and the center
line
And give it the same direction as the waist and hips
Join all the lines you just created to complete the bodice or torso
Draw a line for each leg
To balance the figure, the leg from the higher hip should be close to the center or balance
line
This will be the supporting leg
You draw the back leg
Create it from the lower hip to the 7th line, the one between the lines for the knees and
the ankles
Trace a line for each arm
PHASE 2 - Shapes
Draw a circle for each shoulder, and smaller circles for the elbows and wrists
Draw a couple of circles for the bust
Position them in the middle of the guideline you just created
Draw a guideline for the knees
Draw it with the same direction of the hips
Draw one circle for each knee
Put them over the guideline you just created
Add a couple of circles for the ankles
This time, the circle for the ankle of the supporting leg will be over the line for the
ankles as usual.
And the circle for the back leg will be over the 7th line
Complete the shapes for the arms and legs
Join the circles you created for the arms, and draw a basic shape for the hands.
For the legs, go from the crotch to the circles you created for the knees, and then continue
the line until the circles for the ankles
And for the feet, create a trapeze on the bottom space.
Make sure you center each trapeze with the ankles
Draw some ovals as guides for the thighs and calves
Again the legs look a little weird, so this step is very useful
Now draw an oval to use as a reference for the width of the thighs
It doesn't matter if it surpasses the lines you created for the legs
And draw another oval for each calf.
PHASE 3 - Outline
Outline the body
Now it's time to outline the actual figure.
With the help of the guidelines you created in the previous phases, start giving the body
the organic and fluid look it should have
I like to start drawing the bottom outline of the face
Then I proceed with the neck, collarbone, and shoulders
Continue with the arms, bust, hands, and bodice
Then, complete the legs and the feet
How you draw the feet depends on the kind of footwear you want to draw
If you want some shoes that aren't too pointy shoes, then the base of the shoe should be
curved but not too angular
Draw some clothing if you want
Since this is a figure I'll use a template, I'm only gonna draw a bikini suit
Complete the face and the hair
Use the same method you've learned during this course to draw the face and the hair
Once you finish the fashion figure, you can redraw it on a clean piece of paper with the
help of a light box, a window close to you, or you can even use tracing paper to redraw
the figure there.
And then your figure will be ready to use!
Remember, the process is the same whether you want to create your fashion figures in
the eight heads or ten heads sizes.
Keep drawing, keep practicing the method, and keep learning.
And once you master the method you'll be able to get rid of the cheat-sheet and guidelines
and draw your fashion figures freehand.
And we're done!!
As you can see, the method is exactly the same, you just have to make some little tweaks
to make the figure look like it's walking
I love this pose, and it's one of my favorites because it is dynamic and kind of exudes confidence.
Well, now, it's time for the question of the Day:
Tell me in the comments 'which one is your favorite pose?', you can even share a link
to a Pinterest image - and, I think it could be fun to show you how to draw it with this
method
What do you think, you in?
Great!, that's it for today, I hope you really liked this video and this tutorial,
if you liked it make sure you:
Subscribe + Hit the bell button because I have many more great videos for you
Comment, like and share the video :)
And if you want to join me and other hundreds of students in my course 'Drawing Fashion
Figures and Faces',- go to the link in the cards or in the description box
This course it's full with lessons and videos on how to draw fashion figures and faces in
all kinds of poses and views, and it comes with a printable workbook!
Well, hope to see you there, byeee!

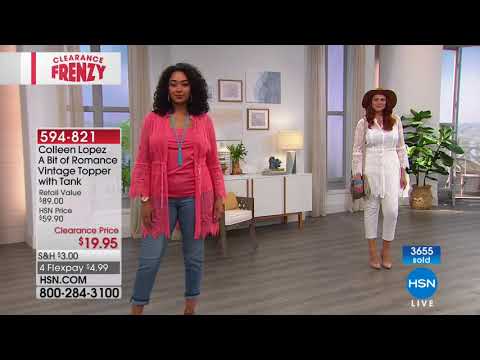 For more infomation >> HSN | Fashion & Accessories Clearance Frenzy Up To 60% Off 09.04.2018 - 07 PM - Duration: 1:00:00.
 For more infomation >> HSN | Fashion & Accessories Clearance Frenzy Up To 60% Off 09.04.2018 - 02 PM - Duration: 1:00:01.
  For more infomation >> HSN | Fashion & Accessories Clearance Frenzy Up To 60% Off 09.04.2018 - 03 PM - Duration: 1:00:01.
  For more infomation >> Kim Kardashian and other celebs show off futuristic 'fashion implants' on body - Duration: 0:56.
  For more infomation >> Discover this year's fashion trends during the summer and fall transition - KING 5 New Day - Duration: 7:31.
 For more infomation >> HSN | Fashion & Accessories Clearance Frenzy Up To 60% Off 09.04.2018 - 11 PM - Duration: 1:00:00.
  For more infomation >> HSN | Fashion & Accessories Clearance Frenzy Up To 60% Off 09.04.2018 - 08 PM - Duration: 1:00:00.
  For more infomation >> Fashion Designer creates the "Survivor Collection" inspired by Hurricane Havey - Duration: 5:47.
  For more infomation >> HSN | Fashion & Accessories Clearance Frenzy Up To 60% Off 09.04.2018 - 10 PM - Duration: 1:00:00.
Không có nhận xét nào:
Đăng nhận xét